📚 Series Table of Contents
- 📖 Chapter 0: Introduction and Stories
- 📚 Chapter 1: Some concepts and terminologies
- 🚀 Chapter 2: A noob guy deploy his web app
- 🐳 Chapter 3: Docker and the world of containerization
- ☸️ Chapter 4: K8s in a nutshell (You are here) 🎯
- 🔧 Chapter 5: K8s in details 🛠️
- 🏠 Chapter 6: Before go to the ground 🏡
- 🐧 Chapter 7: Ubuntu server and the world of Linux 🖥️
- ⚡ Chapter 8: MicroK8s the simple and powerful K8s ⚙️
- ☁️ Chapter 9: Harvester HCI the native cloud 🌐
- 🏭 Chapter 10: More about Harvester HCI 🏢
- 🖥️ Chapter 11: Promox VE the best VM manager 💾
- 🌐 Chapter 12: Turn a server into a router with Pfsense 🔌
- 🛠️ Chapter 13: Some tools, services that you can installed for your devops pipeline 🔧
- 🌍 Chapter 14: Hello Internet with Cloudflare Zero Trust 🔒
- 🎉 Chapter 15: Maybe it the end of the series 🏁
Whether you’re a DevOps engineer or not, you’ve probably heard about Kubernetes or K8s. In this blog, we’ll learn what it is and how it works. This is just a brief overview - in the next chapter, we’ll dive deeper into K8s.
From Docker to Kubernetes
Remember our Docker journey? We learned to containerize applications with docker run, docker-compose, and Dockerfiles. But what happens when you need to run hundreds or thousands of containers across multiple servers?
Docker Limitations:
# This works great for development
docker run -p 3000:3000 my-app
docker-compose up -d
But in production, you need:
- Scaling: How do you run 10, 100, or 1000 containers?
- High Availability: What if a server crashes?
- Load Balancing: How do you distribute traffic?
- Service Discovery: How do containers find each other?
- Rolling Updates: How do you update without downtime?
- Resource Management: How do you prevent one app from hogging resources?
Kubernetes to the Rescue: K8s is like having a smart manager for your container fleet. It handles all the complex orchestration so you can focus on your applications.
Think of it this way:
- Docker = Single container management
- Docker Compose = Multi-container on one machine
- Kubernetes = Multi-container across multiple machines with intelligence
| Docker | Kubernetes |
|---|---|
| Single container | Multiple containers |
| One machine | Multiple machines |
| Manual management | Automated orchestration |
| Basic networking | Advanced networking |
| Simple scaling | Intelligent scaling |
Note: Actually, Docker has Docker Swarm to manage multiple containers across multiple machines. But it’s not as powerful as K8s, so very few people use it.
K8s Core Concepts (Overview)
- First, why do we call it ‘K8s’ for short? Here’s why:
Kubernetes = K + ubernete + s. The word ‘ubernete’ has 8 letters => K8s :))) - K8s is a project from Google, but now it’s under the Cloud Native Computing Foundation (CNCF).
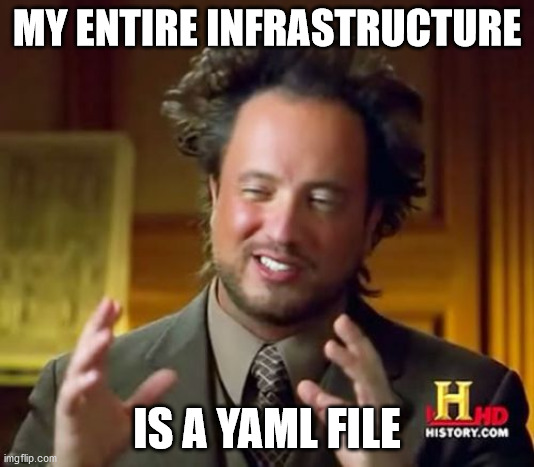
- K8s looks very complex with many new concepts, but don’t worry - at the end of the day, you just work with lots and lots of YAML files.
🏗️ Cluster Architecture
- Pod: In the Docker world, the smallest unit is a container. In the K8s world, the smallest unit is a Pod. A Pod is a unit that runs your containers (usually 1 pod = 1 container, but can have multiple containers inside a pod).
- Node: A machine (physical or virtual) that has K8s installed and runs your containers. It can be a worker node or a master node.
- Cluster: Group all your nodes together and you have a K8s cluster. A cluster can have one master node and multiple worker nodes, or multiple master nodes. For small clusters (e.g., 2 or 3 nodes), you can set all of them as master nodes.
- Deployment: Manages pod replicas and updates
- Service: Stable network endpoint for pods
- Secret: Secure way to store sensitive data
📦 Control the cluster
- Each node in the cluster will have many services installed based on its role (master node or worker node). They can communicate with each other via the API server.
- The master node of a K8s cluster runs services to control all nodes in the cluster (deploy deployments, scale deployments, etc.) and an API server that you can call to control the cluster.
- Most of the time, you just work with the master node and API server via a command-line tool called
kubectl. (Behind the scenes, this tool calls the K8s cluster API server)
Install MicroK8s
The best way to learn K8s is to try installing it on your local machine. MicroK8s is the simplest way to get Kubernetes running locally. It’s perfect for learning and development.
# Install MicroK8s
sudo snap install microk8s --classic
At this point, your machine is now a K8s cluster with 1 master node. Note that MicroK8s installs its own kubectl as microk8s kubectl. In the real world, you need to install kubectl on your machine and configure it to control your MicroK8s cluster (and other clusters you have too - e.g., I’m managing about 10 clusters).
Your First K8s Deployment (Commands)
Let’s deploy a simple nginx app using kubectl commands:
# Get nodes in the cluster
sudo microk8s kubectl get nodes

# Create a deployment
sudo microk8s kubectl create deployment nginx-app --image=nginx:alpine

# Scale the deployment
sudo microk8s kubectl scale deployment nginx-app --replicas=3

# Expose the deployment
sudo microk8s kubectl expose deployment nginx-app --port=80 --type=LoadBalancer

# Check what we created
sudo microk8s kubectl get pods
sudo microk8s kubectl get services
sudo microk8s kubectl get deployments

# Get detailed info
sudo microk8s kubectl describe pod <pod-name>
sudo microk8s kubectl describe service nginx-app

# View logs
sudo microk8s kubectl logs <pod-name>
sudo microk8s kubectl logs -f <pod-name>  # Follow logs

# Execute commands in pod
sudo microk8s kubectl exec -it <pod-name> -- /bin/sh- Explanations:
- You can use any image you want (or the image you built and pushed to Docker Hub in chapter 3). At this point, you cannot access the nginx app from your browser because the service is not exposed to the internet. We’ll talk more about this in the next chapter.
- Deployment is a resource that manages pods. It ensures that pods are running and healthy.
- Service is a resource that exposes pods to the outside world. We’ll talk more about this in the next chapter.
- pod-name is the name of the pod you created. You can get it by running
sudo microk8s kubectl get pods. - There’s another important resource called namespace. It’s a way to group resources together. You can create a namespace by running
sudo microk8s kubectl create namespace <namespace-name>and add--namespace <namespace-name>to any kubectl command to tell kubectl to operate on that namespace. If you don’t specify the namespace, kubectl will operate on the default namespace (as shown in the code example).
K8s Features in Action
Rolling Updates
# Update the image
sudo microk8s kubectl set image deployment nginx-app nginx=nginx:latest

# Check rollout status
sudo microk8s kubectl rollout status deployment nginx-app

# Rollback if needed
sudo microk8s kubectl rollout undo deployment nginx-app

# Check rollout history
sudo microk8s kubectl rollout history deployment nginx-app- Rolling update is a great feature of K8s. It allows you to update the image of a deployment without downtime.
- Rolling updates always keep the old pods running until the new pods are ready.
Scaling
# Scale up
sudo microk8s kubectl scale deployment nginx-app --replicas=5  # Scale to 5 pods

# Scale down
sudo microk8s kubectl scale deployment nginx-app --replicas=2

# Auto-scaling (if metrics-server is enabled)
sudo microk8s kubectl autoscale deployment nginx-app --min=2 --max=10 --cpu-percent=50- This is what Docker finds hard to do. In K8s, when you want to scale an app (e.g., when your backend has a lot of requests), you can just scale the deployment and K8s will take care of the rest. When your app doesn’t need to handle so many requests, you can scale down the deployment to save resources.
- These tasks are handled by the ReplicaSet resource. It ensures that the number of pods is always the same as the number of replicas.
Deploy with YAML Files
- Like Docker Compose, K8s also uses YAML files to deploy resources (saving you from typing a lot of commands).
# nginx-deployment.yaml
apiVersion: apps/v1
kind: Deployment
metadata:
  name: nginx-app
  labels:
    app: nginx
spec:
  replicas: 3
  selector:
    matchLabels:
      app: nginx
  template:
    metadata:
      labels:
        app: nginx
    spec:
      containers:
      - name: nginx
        image: nginx:alpine
        ports:
        - containerPort: 80
        resources:
          requests:
            memory: "64Mi"
            cpu: "250m"
          limits:
            memory: "128Mi"
            cpu: "500m"
---
apiVersion: v1
kind: Service
metadata:
  name: nginx-service
spec:
  selector:
    app: nginx
  ports:
  - port: 80
    targetPort: 80
type: LoadBalancer- Look at the YAML file - you can see I define a deployment that runs 3 pods of the nginx image and a service that exposes the deployment to the outside world. (Again, you don’t need to know which service is which - we’ll cover it in detail in the next blog) Deploy with YAML:
# Apply the configuration
sudo microk8s kubectl apply -f nginx-deployment.yaml

# Check status
sudo microk8s kubectl get pods
sudo microk8s kubectl get services

# Update the deployment
sudo microk8s kubectl apply -f nginx-deployment.yaml

# Delete resources
sudo microk8s kubectl delete -f nginx-deployment.yaml
Essential kubectl Commands
Some kubectl commands you should know:
# Cluster info
sudo microk8s kubectl cluster-info
sudo microk8s kubectl get nodes

# Pods
sudo microk8s kubectl get pods
sudo microk8s kubectl get pods -o wide
sudo microk8s kubectl describe pod <pod-name>
sudo microk8s kubectl logs <pod-name>

# Deployments
sudo microk8s kubectl get deployments
sudo microk8s kubectl describe deployment <deployment-name>
sudo microk8s kubectl rollout status deployment <deployment-name>

# Services
sudo microk8s kubectl get services
sudo microk8s kubectl describe service <service-name>

# Namespaces
sudo microk8s kubectl get namespaces
sudo microk8s kubectl create namespace my-namespace

# Delete resources
sudo microk8s kubectl delete pod <pod-name>
sudo microk8s kubectl delete deployment <deployment-name>
sudo microk8s kubectl delete service <service-name>
What’s Next?
This is just the beginning! In the next chapter, we’ll dive deeper into:
- Advanced K8s concepts
- K8s networking
- Expose HTTP via Ingress
Quick Summary
✅ What we covered:
- Docker to Kubernetes transition
- K8s core concepts overview
- MicroK8s installation
- First deployment with commands
- Pod inspection and management
- Rolling updates and scaling
- YAML file deployments
Conclusion
Kubernetes might seem complex at first, but it’s just a container orchestrator that makes your life easier. Start with the basics, practice locally with MicroK8s, and gradually explore advanced features. The best way to learn K8s is by doing - deploy applications, break things, and fix them! Don’t know how to fix? Don’t forget these days you have AI assistants to help you.
📚 Series Navigation
| ← Previous Chapter
🐳 Docker and the world of containerization | DevOps Series
Chapter 4 of 16 | Next Chapter →
🔧 K8s in details |