When i deploy my physicals to Datacenter they do not provide my any router or switch. We can easily buy a router like mikrotik,… but we can install pfsense - a router OS to a server so this can work as a router
Router work as it name. It routes all your network traffics in side your server cluster through internet. Router always have 2 port WAN: for connecting to external Internet and LAN for the devices use this Internet
This post help you walk through how to setup a pfsense typically to a Virtual Machine in Promox VE
Prestique
- To make a server to a router of this server MUST HAVE MORE THAN 2 ETHERNET PORTS (1 for WAN and another for LAN)
- You can install pfsense directly to a server or to a VM inside promox
- If you install directly to server skip step Bridge Network for Promox
- Basic knowledge of creating and managing VMs with Promox
Bridge Network for Promox
By default Promox will use an Ethernet port for internet connection we will use this port as WAN of the router
But we need to add another network port so it can work as LAN port of the router. Here is how
Access your promox web dashboard then navigate to node-name => System => Network
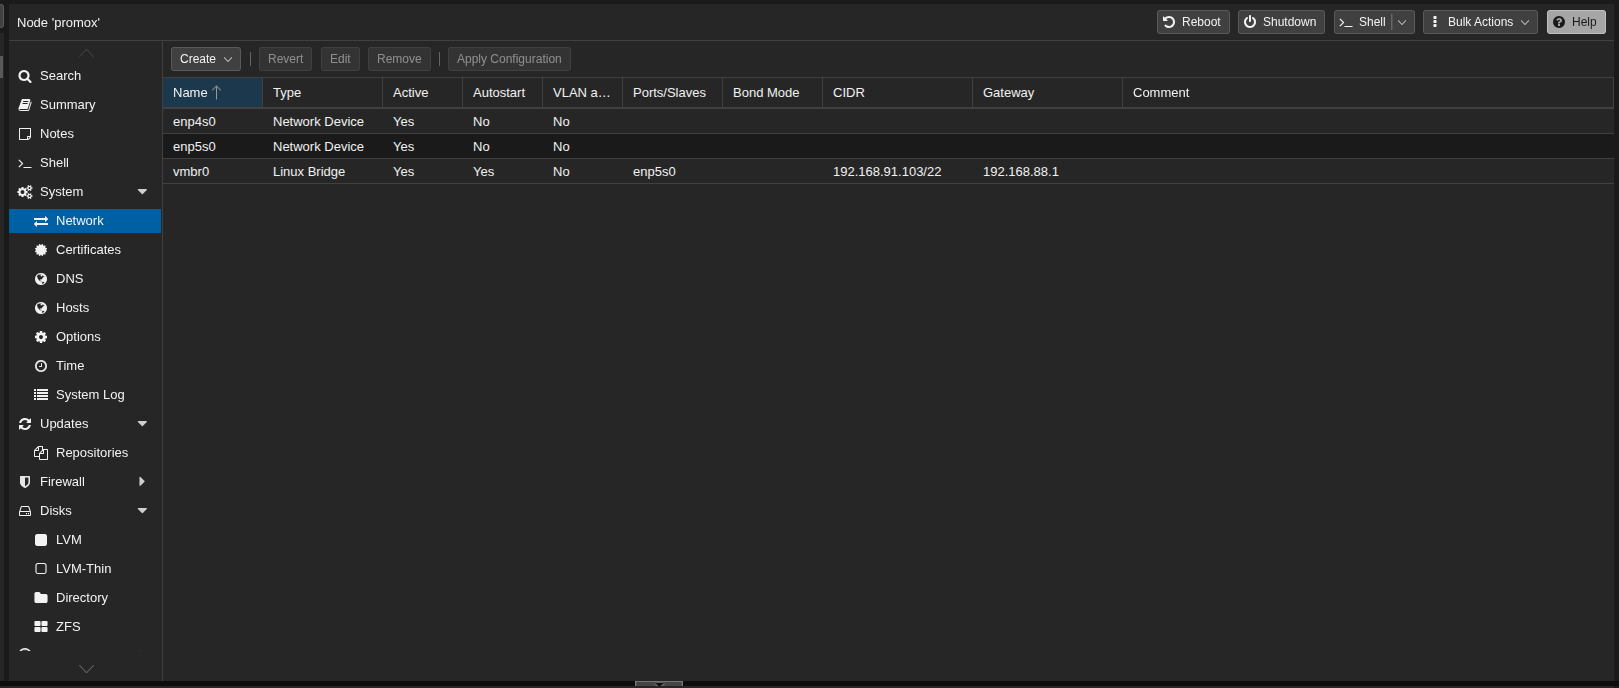
- By default this is the network interfaces 2 port enp4s0 and enp5s0 and the esp5s0 have already been bridged to promox
- We’ll add another bridge for other port which is enp4s0 so promox now will recognize 2 port of network
- Click Create -> Linux Bridge then enter the form like this
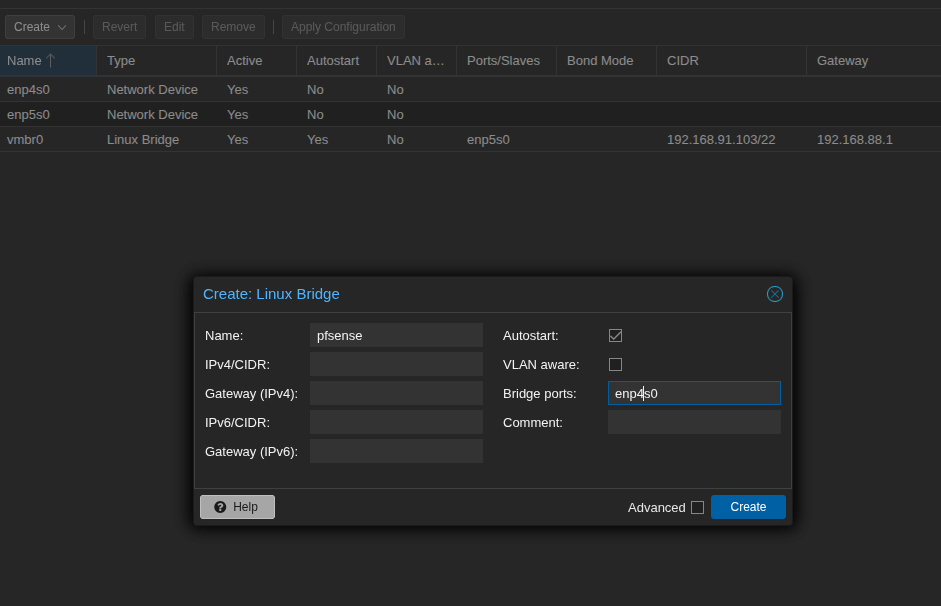
Then Click Apply Configurations
At this point note down your ethernet mac address which for wan and for lan it will be useful later when you chose wan or lan when setup pfesense
Install Pfsense
- Download pfsense iso installation file from the homepage: https://www.pfsense.org/download/
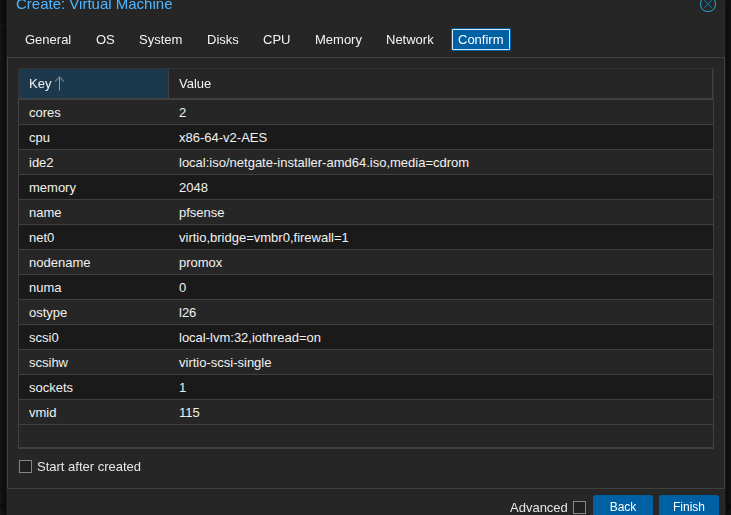
- Upload the ISO file to Promox then create new VM with use this ISO Pfsense is very light weight you don’t need to provide much ressoure just 1gb ram 1 or 2 cpu cores is enough
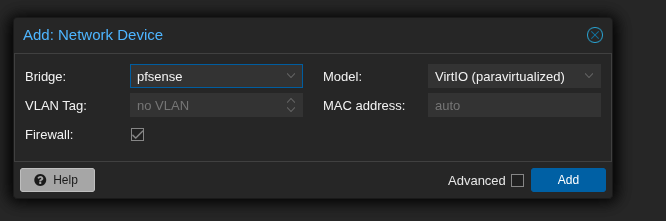
 -Before start let’s add network service to the VM. VM name => hardware => Add => Network device
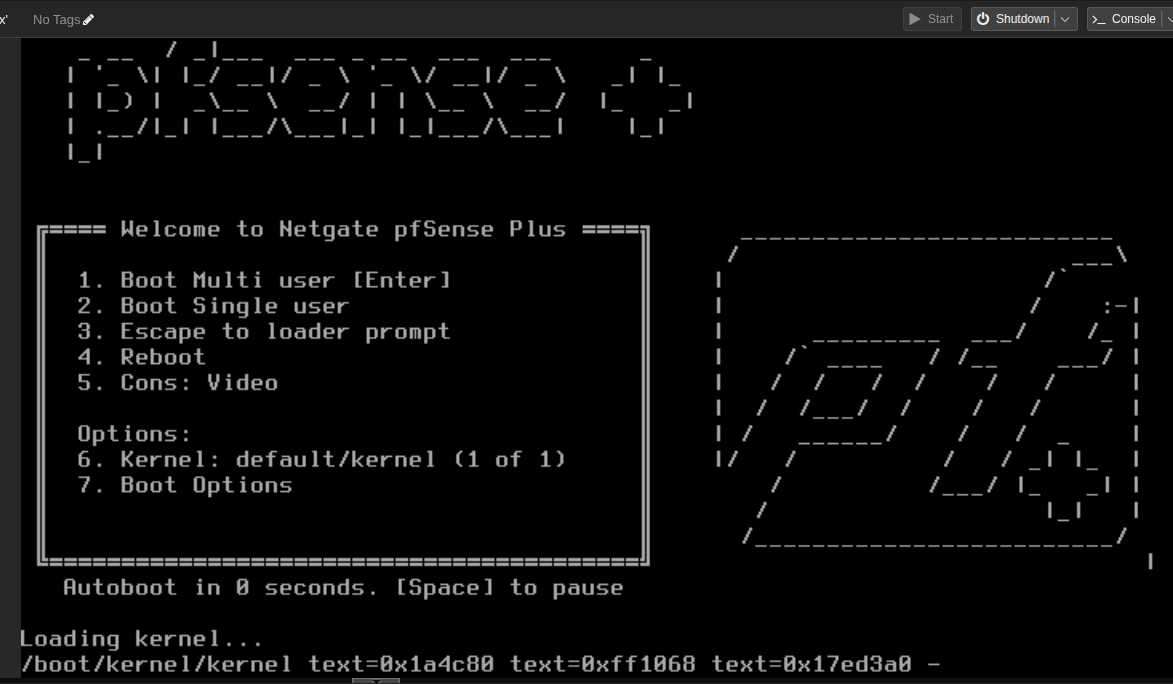
Start the VM
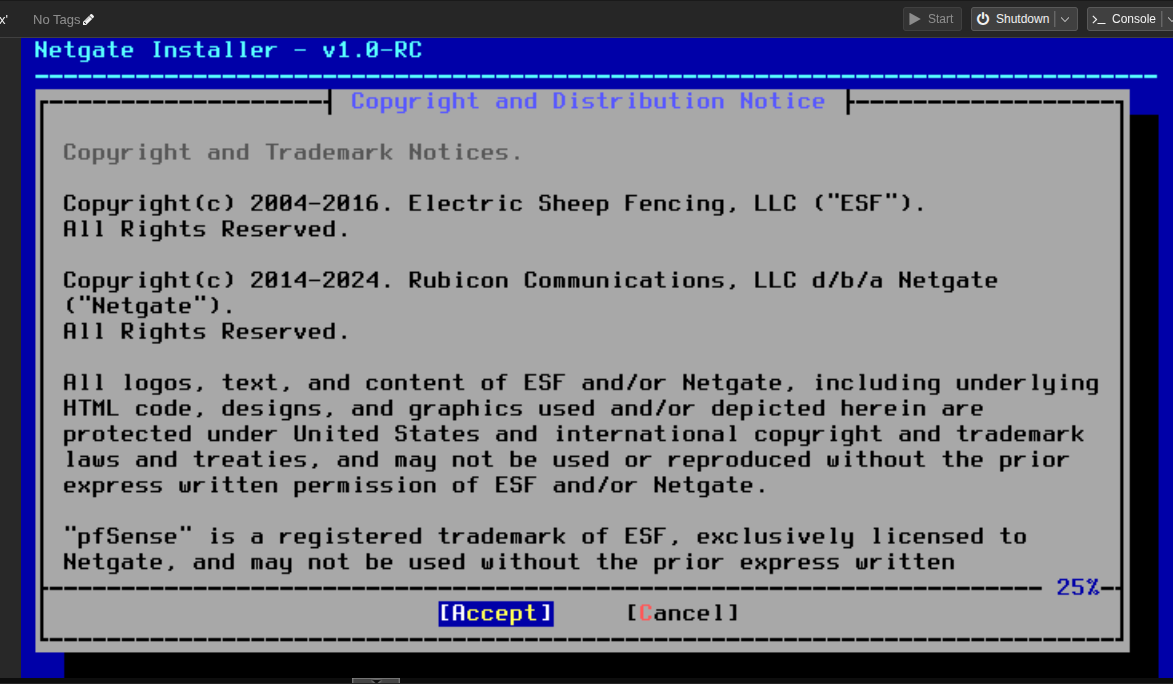
 Accept
 just accept or next then you will see this
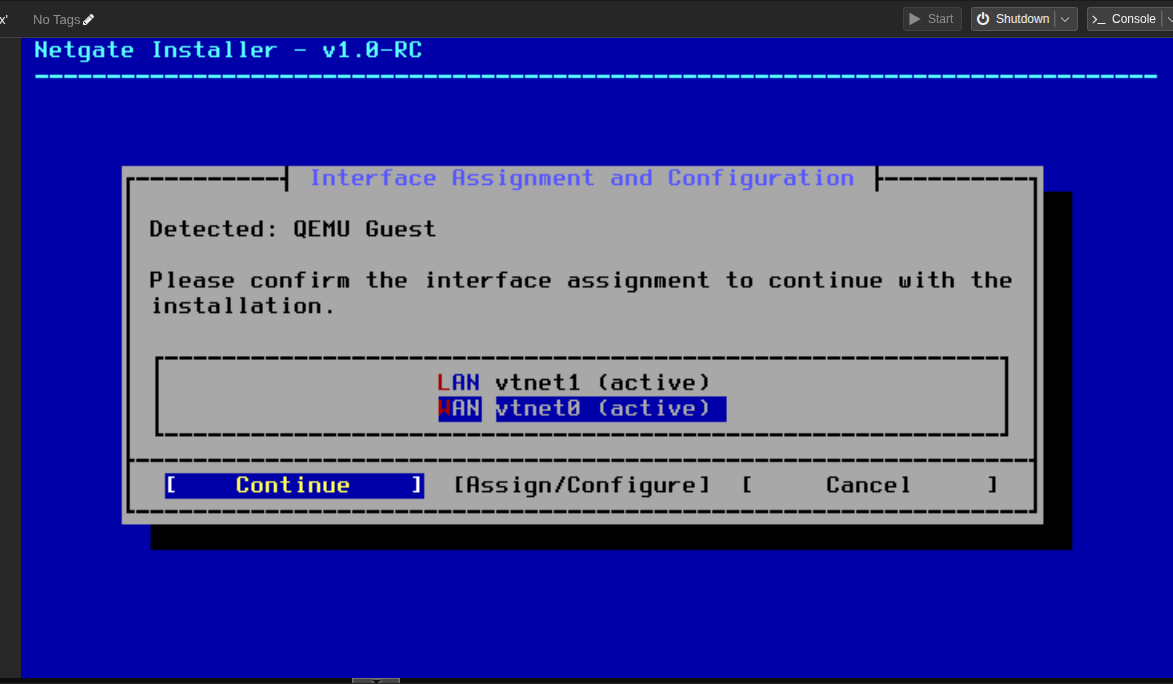
 Just chose one for wan and remember it so another will be wan we can config it later so now just choose first one to be wan (WAN port must be the port have internet from outside but we can change and test later)
- Then just choose process we will config IP for wan and lan later when installation complete
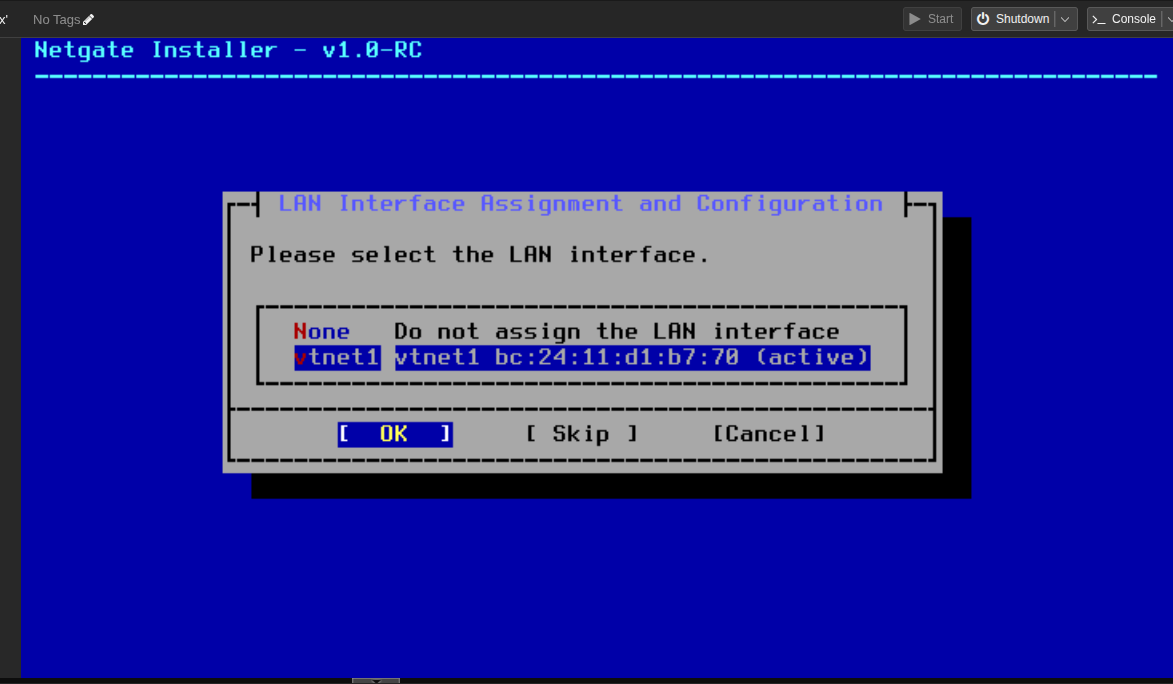
- Select another port to be LAN port
 Then process
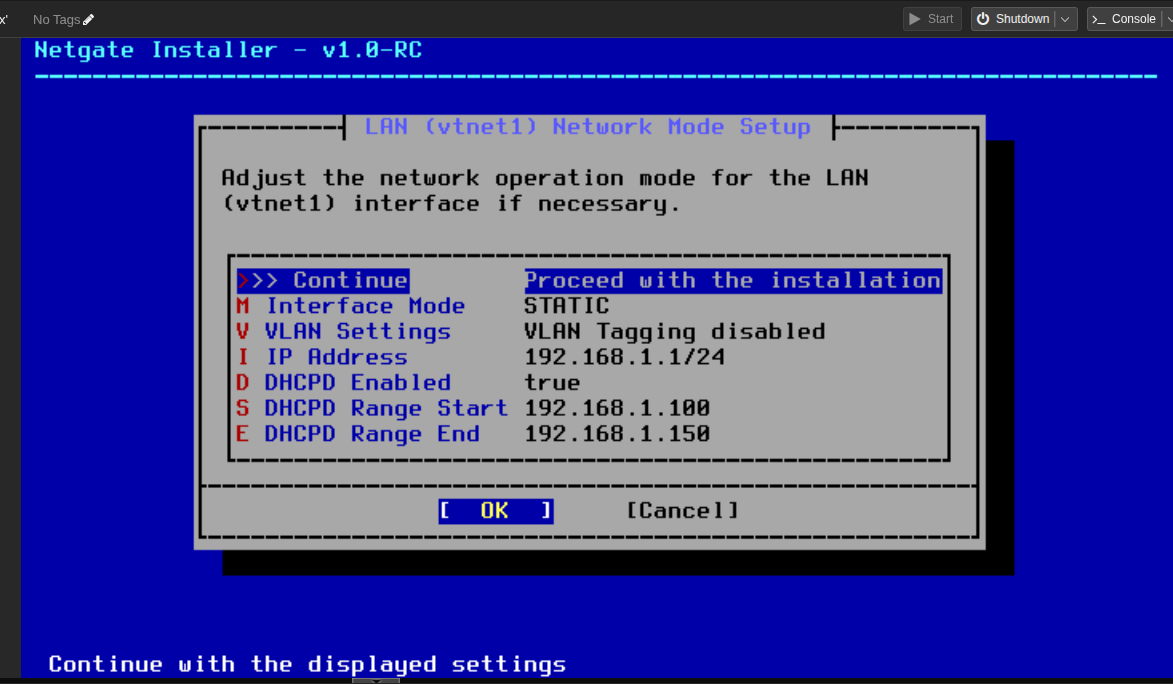 by default it will allocate the 192.168.1.1/24 as LAN DCHP Ip we can config it latter so just process
Interface assigment we chose wan
by default it will allocate the 192.168.1.1/24 as LAN DCHP Ip we can config it latter so just process
Interface assigment we chose wan
I belive at this point if wan have no internet connection (you chose wrong wan port)
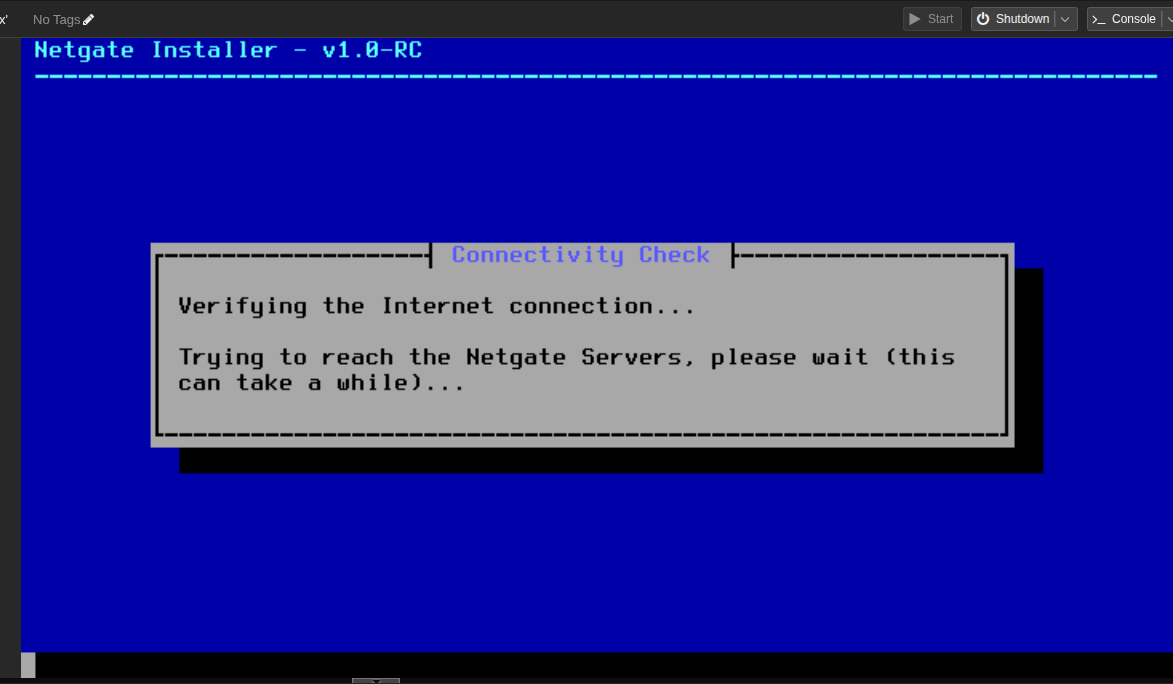 The installation will throw error and you can chose again. Luckyly im not so here is the next step
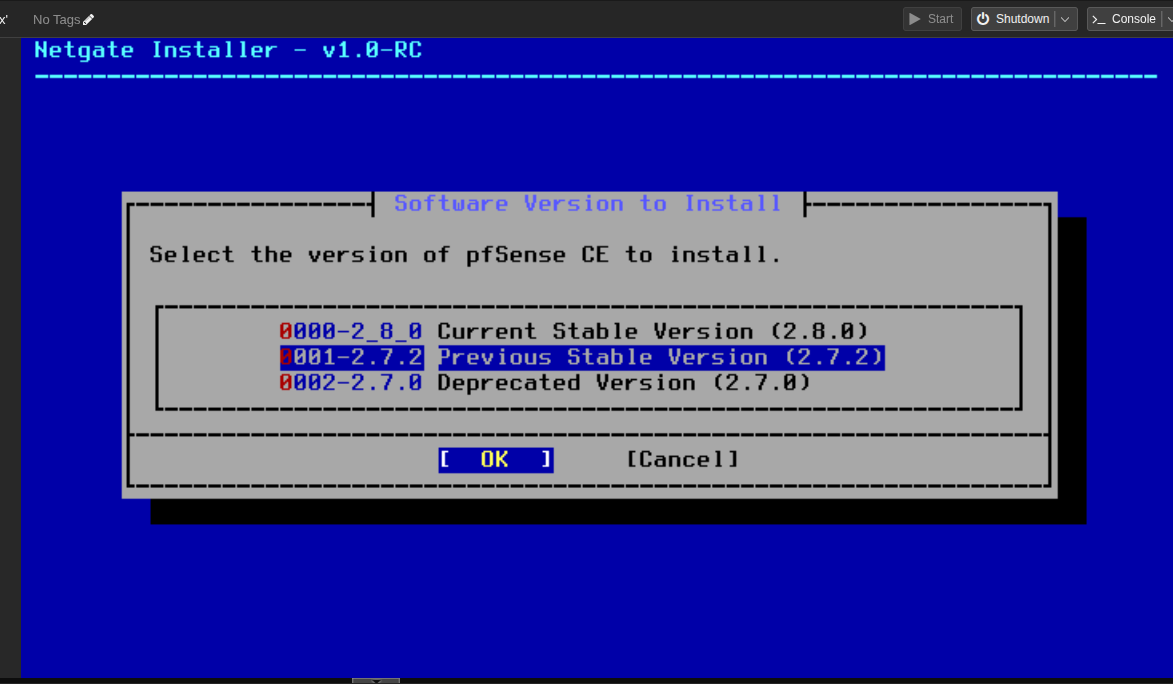
 Just choose install CE and then the installation will ask you about use UEFI or MBR and use what disk just like another OS installation just process or continue to this step we chose version 2.7.2 stable then continue
Ok take a coffee then wait for the installation
Config WAN IP and LAN IP
- Wan IP is the IP of the Server/VM it self
- LAN IP is the IP of the server/VM in LAN network and also the DHCP range
- For example i want my pfesnse VM have IP 192.168.90.100 because promox VE live in side my LAN network which have DHCP of 192.168.88.0/22 so I chose WAN IP is 192.168.90.100
- But as it is a router so it can allocate internet to its children so we need configure LAN. let’s say I want to setup DHCP range for devices underbound of pfsense is 192.168.4.0/24 and the LAN IP is 192.168.4.1 => we can access the pfesnse via 192.168.90.100 when we connect to the uperbound network or 192.168.4.1 when we connect to the underbound network (provide by pfsense)
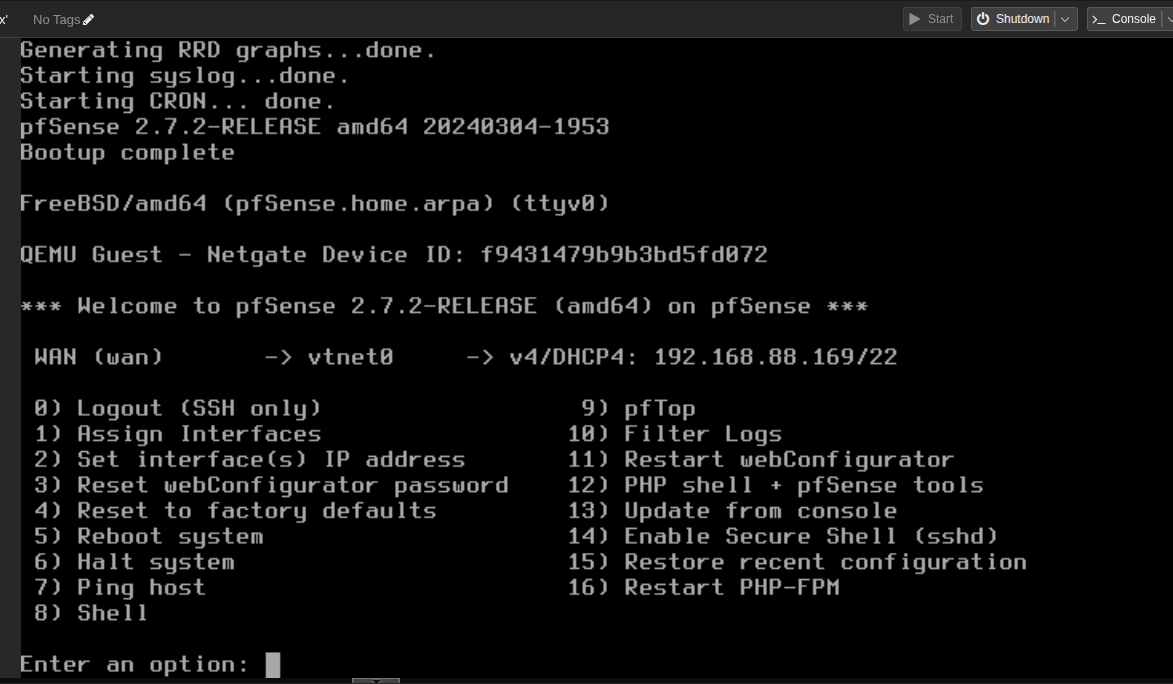
Ok’s let see after installation done it will request you to reboot just reboot then now we will config the IP for WAN and LAN
first just say n (no) for install lan and chose a for auto detect wan port
 if it save no link-up detect type manualy one usually the first one if failed choose another
Ok now you will see this screen
if it save no link-up detect type manualy one usually the first one if failed choose another
Ok now you will see this screen
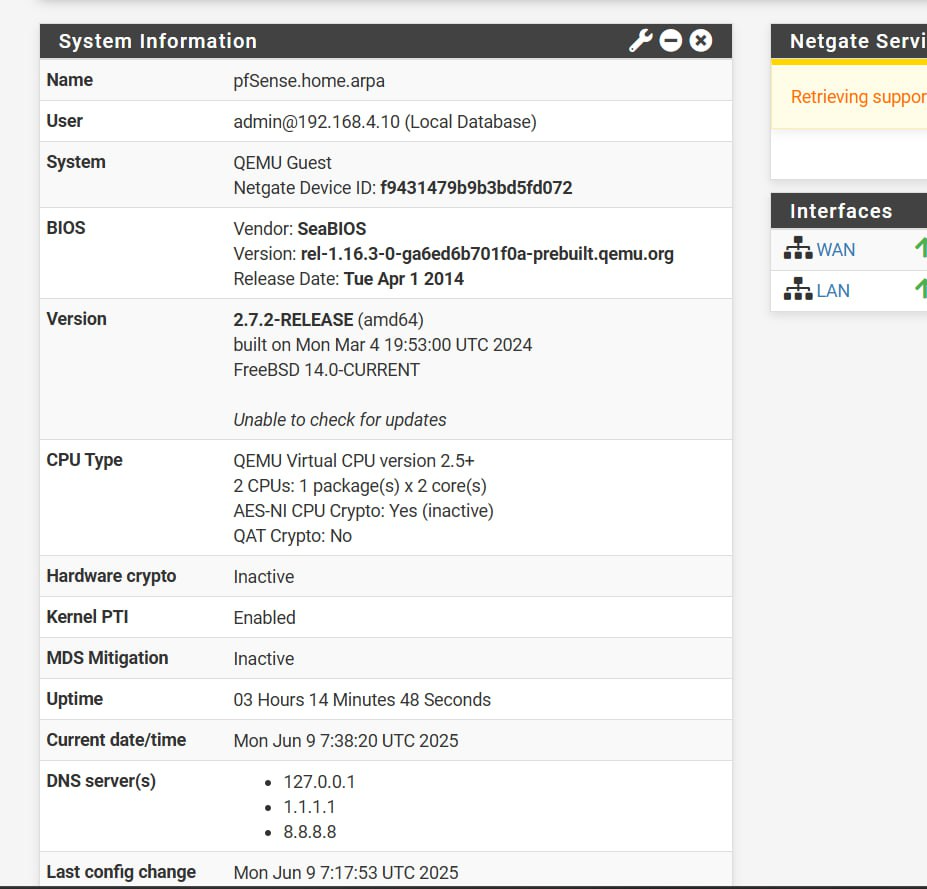
 You can access the web dashboard with IP shown and username is admin pass is pfsense
Navigate to quick setup wizard REMEMBER TO CONFIG DNS SERVER so your lan devices can access domain names
You can access the web dashboard with IP shown and username is admin pass is pfsense
Navigate to quick setup wizard REMEMBER TO CONFIG DNS SERVER so your lan devices can access domain names
 The next configuration can be done via web dashboard but we can do it in terminal
-
Assign Interfaces Press 1 then enter, chose n/no when it ask vlan setup. Then chose wan interface let choose first one vtnet0 and LAN is another vtnet1
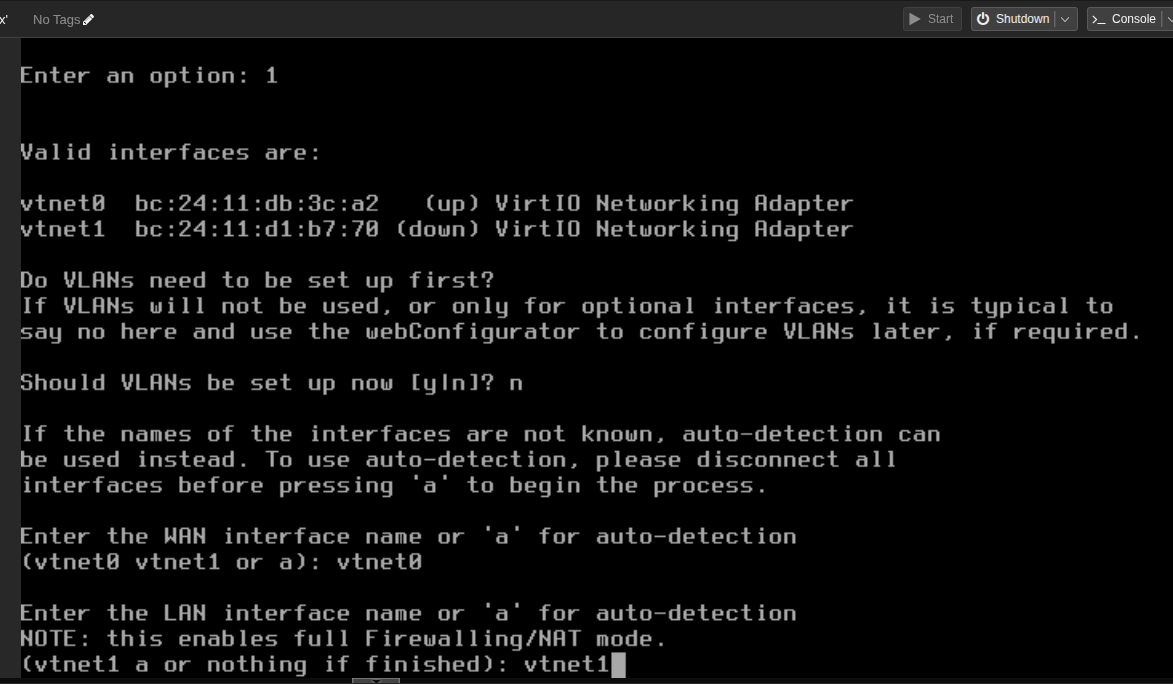 then procedd
 -
Set interface IP
-
WAN IP
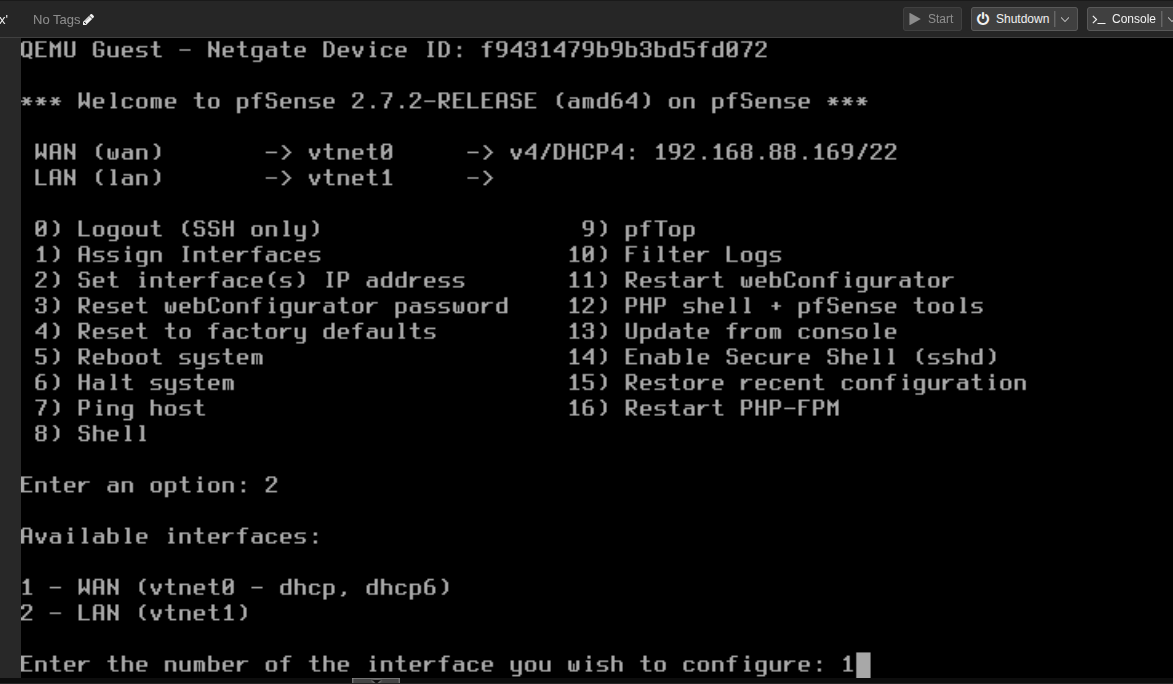 it will ask you some question and here how
- WAN DHCP IPv4: chose no because we want static
- WAN IPv4: enter your IP here I chose 192.168.90.100
- WAN IPv4 subnet: 22
- WAN IPv4 gateway: Your gateway mine is 192.1668.88.1
- WAN default gateway: y
- WAN IPv6: n
- WAN IPv6 address: none (just press enter)
- WAN DHCP server: n
- WAN HTTP revert: n
-
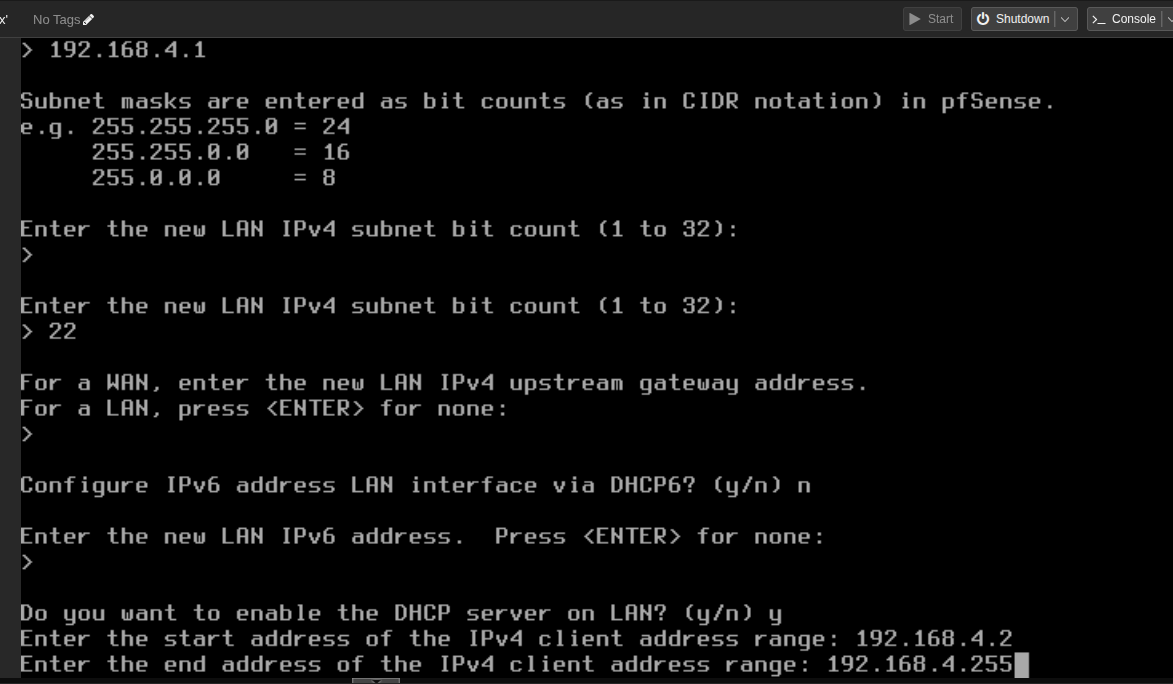
LAN IP after this choose 2 for again and chose setup lan IP
- LAN DHCP IPv4: n
- LAN IPv4: Your pfense IP here I chose 192.168.4.1
- LAN IPv4 subnet: 22
- LAN IPv4 gateway: none
- LAN default gateway: n
- LAN IPv6: n
- LAN IPv6 address: none
- LAN DHCP server: y
- LAN DHCP start: DHCP range start I chose 192.168.4.2
- LAN DHCP end: DHCP range end I chose 192.168.4.255
- LAN HTTP revert: n
 Oke when it show like this
 Then the installation is complete
Next step
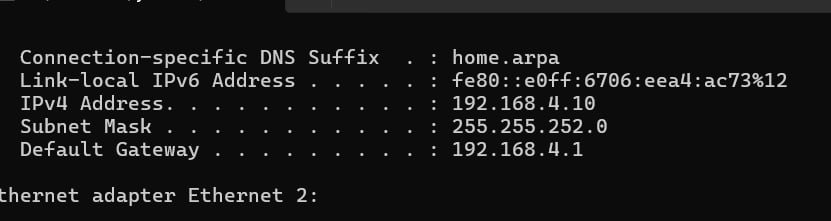
wanna test Oke let bring a latop to DC or Server Room plug ethernet connection from your Server to your laptop and see can you access internet which your laptop local lan IP and can you access pfsense web dashboard with your laptop via 192.168.4.1
If you forgot to set DNS at above step you can do it now so you can access domain name. then here is result
some notes
by defaut wan IP will be block you can not access via 192.168.90.100 you can open it in web dashboard or forwading port I’ll update it later.